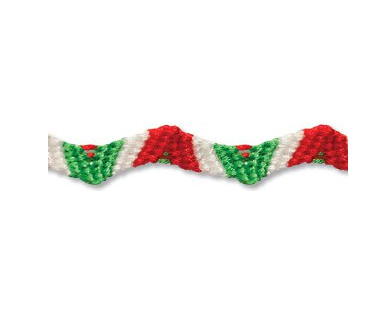
Garland Design Tutorial
1. Pick 3 different colors. (The example uses red, white, & green). You will need 1 strand of each color, red, white & green. If you want a wider bracelet you would need to add additional strands.
2. Align string, fold in half, and tie knot ½ inch from fold forming a loop.
3. Attach your ½ inch loop to MYFBM under the butterfly clip.
4. Separate strings by placing one string per slot. Note: Use the same color in slots 3 & 4 (red), slots 5 & 6 (white) & slots 7 & 8 (green). This will align the colors of your bracelet pattern.
5. To begin, take string #3 (red) and make 5 right hand double knots. One each, on string #4 (red), string #5 (white), string #6 (white), string #7 (green) & string #8 (green). String #3 (red) will now be in slot 8.
6. Take string #3 (red) and make 5 right hand double knots. One each, on string #4 (white), string #5 (white), string #6 (green), string #7 (green) & string #8 (red). String #3 (red) will now be in slot 8.
7. Take string #3 (white) and make 5 right hand double knots. One each, on string #4 (white), string #5 (green), string #6 (green), string #7 (red) & string #8 (red). String #3 (white) will now be in slot 8.
8. Take string #3 (white) and make 5 right hand double knots. One each, on string #4 (green), string #5 (green), string #6 (red), string #7 (red) & string #8 (white). String #3 (white) will now be in slot 8.
9. Take string #3 (green) and make 5 right hand double knots. One each, on string #4 (green), string #5 (red), string #6 (red), string #7 (white) & string #8 (white). String #3 (green) will now be in slot 8.
10. Take string #3 (green) and make 5 right hand double knots. One each, on string #4 (red), string #5 (red), string #6 (white), string #7 (white) & string #8 (green). String #3 (green) will now be in slot 8.
11. Take string #8 (green) and make 5 left hand double knots. One each, on string #7 (green), string #6 (white), string #5 (white), string #4 (red) & string #3 (red). String #8 (green) will now be in slot 3.
12. Take string #8 (green) and make 5 left hand double knots. One each, on string #7 (white), string #6 (white), string #5 (red), string #4 (red) & string #3 (green). String #8 (green) will now be in slot 3.
13. Take string #8 (white) and make 5 left hand double knots. One each, on string #7 (white), string #6 (red), string #5 (red), string #4 (green) & string #3 (green). String #8 (white) will now be in slot 3.
14. Take string #8 (white) and make 5 left hand double knots. One each, on string #7 (red), string #6 (red), string #5 (green), string #4 (green) & string #3 (white). String #8 (white) will now be in slot 3.
15. Take string #8 (red) and make 5 left hand double knots. One each, on string #7 (red), string #6 (green), string #5 (green), string #4 (white) & string #3 (white). String #8 (red) will now be in slot 3.
16. Take string #8 (red) and make 5 left hand double knots. One each, on string #7 (green), string #6 (green), string #5 (white), string #4 (white) & string #3 (red). String #8 (red) will now be in slot 3.
17. At this point your pattern will now repeat itself. Repeat steps 5-16 to continue the pattern until your bracelet is long enough to fit your wrist.
18. Once you bracelet is long enough to fit your wrist take strings from the slots 3 & 4 in your left hand and the strings from slots 7 & 8 in your right hand and braid with the remaining 2 center strings.
19. Take the braided strings and tie two basic knots at the end of your friendship bracelet.
20. Unclip your friendship bracelet from the butterfly clip and cut off the excess braided section. Your bracelet is ready to wear or share!
0 Comments
There are no comments yet. Be the first one to post one!